Welcome to the abyss of obsession, where plastic runners and credit card debt reign supreme. If you’re searching for the basic tools for Gunpla beginners, you’re about to face the painful truth: just one cheap item is enough to turn your dream Gundam kit into a $30 pile of regret.
I know the drill. I’ve lived it. My first Gunpla? Kitchen scissors plus Super Glue equals instant trash. I cut too deep, left sticky plastic scars, and ended up picking at the messy glue patches with my fingernail. Never repeat this disaster.
You think a model kit is just a snap-together toy? Wrong! It’s micro-surgery. And if you use a dull scalpel, you’re in for a runner removal fail. You’re going to run into noob errors like snapped parts, those disgustingly white “nub marks,” and the pure, unadulterated heartbreak of a tiny piece flying into the carpet dimension, never to be seen again.
Don’t scam yourself into thinking “a pair of cutters is enough.” Equip yourself with the proper essential model kit tools. Read this Gundam assembly tools 2026 guide to avoid those classic beginner model kit mistakes, and then, maybe, just maybe, navigate to our store to start with our beginner kit today.
I. The Nippers – The #1 Basic Tool for Gunpla Beginners (That Most Noobs Ruin)
Ah, the nippers. The humble, yet critically misunderstood, first line of defense against a truly terrible build. If you walk away from this article with nothing else, remember this: your nippers are not kitchen scissors, wire cutters, or those blunt monstrosities you found in your dad’s toolbox. This isn’t a suggestion; it’s a sacred commandment for basic tools for Gunpla beginners. I once, in a moment of pure, unadulterated desperation and broke-ass-ness, tried to cut parts off a runner with my mom’s kitchen scissors. The result? A perfectly good RX-78-2 High Grade looking like it had gone ten rounds with a rabid badger. Stress marks, gouges, and a piece of plastic that looked less like a Gundam part and more like a chewed-up dog toy. Don’t be me. Don’t fall for this nipper trap.
The primary keyword, basic tools for Gunpla beginners, truly starts and ends with your nippers. These aren’t just cutters; they are precision instruments designed to separate delicate plastic parts from the runner with minimal stress and damage. Without the right pair, you’re not building; you’re actively trying to destroy your kit before you even get to the fun part. The sheer volume of nub marks and snapped parts I’ve seen from people trying to skimp on this one tool is enough to make a seasoned collector like me weep openly. You think you’re saving a few bucks? You’re actually signing up for hours of extra sanding, putty work, or worse, having to repurchase entire kits because you tried to go cheap. This is a crucial element of the gunpla nippers guide you wish you had before your first gunpla runner removal disaster.
1. Why Cheap Nippers Are a Gunpla Beginner’s Worst Nightmare
Let’s be brutally honest: cheap nippers are a scam. They are dull, poorly aligned, and built with the structural integrity of a wet paper bag. When you try to use them, they don’t cut the plastic; they crush it. This crushing action causes stress marks – those ugly white spots that permanently mar your beautiful plastic. It creates larger, rougher nub marks that take forever to clean up, and often, it leads to snapped parts, particularly on thinner pieces or delicate antennas. I’ve seen more Gundam V-fins become V-stubs because some poor soul thought a $5 pair of nippers from the dollar store would do the trick. The regret is immediate, and the yellowing plastic of a ruined part is a constant reminder of that initial mistake.
Think about it: you’re paying good money for a model kit, sometimes upwards of $50 or $100. Why would you then deliberately undermine that investment with a tool that practically guarantees a subpar result? It’s like buying a Ferrari and then trying to fill it with low-grade diesel. It just doesn’t make sense. Your first experience with Gunpla should be exciting, not a struggle against poorly designed tools. This is why investing in quality nippers is paramount when considering essential model kit tools for a gunpla nippers guide.
Pro-Tip from a Jaded Vet: Always cut twice. First, cut the part away from the runner with a few millimeters to spare (the rough cut). Second, make the final, clean cut right up against the part. A good nipper is essential for that second cut, preventing a gunpla runner removal disaster.
2. God Hand vs Tamiya – The 2026 Showdown for Basic Tools for Gunpla Beginners
Now, for the eternal debate among Gunpla enthusiasts: God Hand vs. Tamiya. For basic tools for Gunpla beginners, these two brands dominate the nipper landscape, and for good reason.
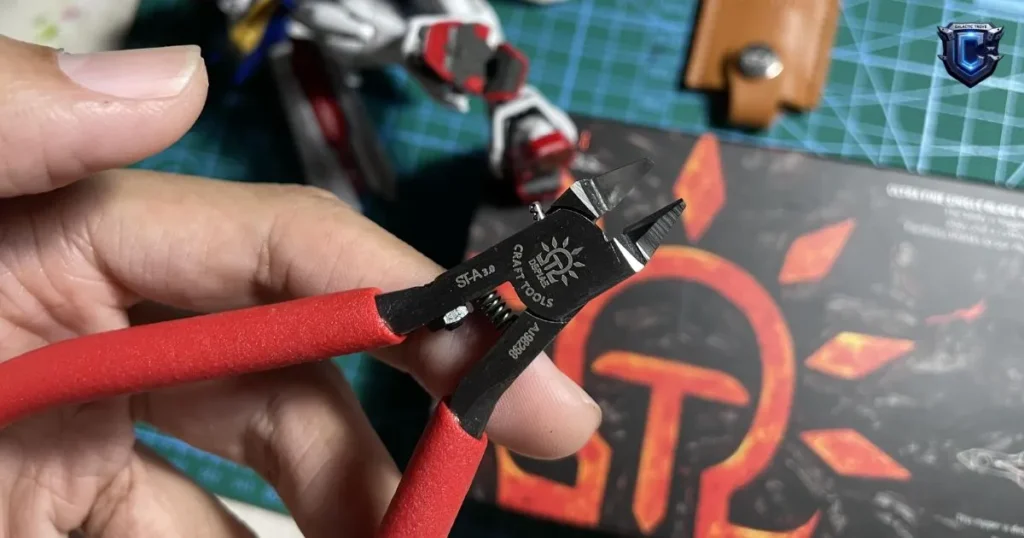
God Hand (specifically the SPN-120 Ultimate Nipper) is legendary. It’s the closest you’ll get to a lightsaber for cutting plastic. The single blade design means it slices through plastic like butter, leaving almost imperceptible nub marks. It’s an absolute dream, a revelation. The catch? The price. These bad boys can run you upwards of $50-$70, and they are delicate. Drop them once, and you might as well have dropped a small child. They aren’t meant for cutting thick gates or stress testing; they’re for finishing cuts. If you can afford them, and you promise to treat them like the fragile, magical unicorns they are, they are unparalleled. But for a true beginner, the thought of dropping that much cash on a nipper can be daunting, and the risk of immediate damage is real. You’ll avoid this nipper trap, but risk a different kind of heartbreak if you drop them.
Tamiya offers a more robust, budget-friendly, and beginner-forgiving option. Their Sharp Pointed Side Cutters (usually around $20-$30) are the workhorse nippers of the Gunpla world. They have a double-bladed design that is incredibly durable and provides consistently clean cuts, far superior to any generic craft nipper. They might not give you the God Hand magic, but they will give you excellent results without breaking the bank or your heartbreak if you accidentally drop them. For basic tools for Gunpla beginners, especially if you’re just dipping your toes in, Tamiya is the sensible, reliable choice. You can use them for the initial rough cuts and the final clean cuts without too much worry. This is your best shot at getting the best nippers for Gunpla without going bankrupt.
Here’s a quick rundown to help you decide on your first essential model kit tools for nippers:
| Nipper Types (Tool) | Price Range (USD) | Regret Level (1-5, 5 is highest) | Notes |
| Kitchen/Wire Cutters | $1 – $5 | 5 (Catastrophic) | Guarantees snapped parts, stress marks, and extremely rough nub marks. Absolutely DO NOT USE. A true beginner model kit mistake. |
| Tamiya Sharp Pointed | $20 – $30 | 1 (The Sensible Choice) | Durable, cuts clean, the best overall choice for basic tools for Gunpla beginners. Low risk of disaster. |
| God Hand SPN-120 | $50 – $70 | 2 (Fragile, but Flawless) | Cuts virtually mark-free. Only for the final cut. High risk of damaging the blade if abused. |
II. Files & Sandpaper – The Second Most Critical Basic Tool for Gunpla Beginners
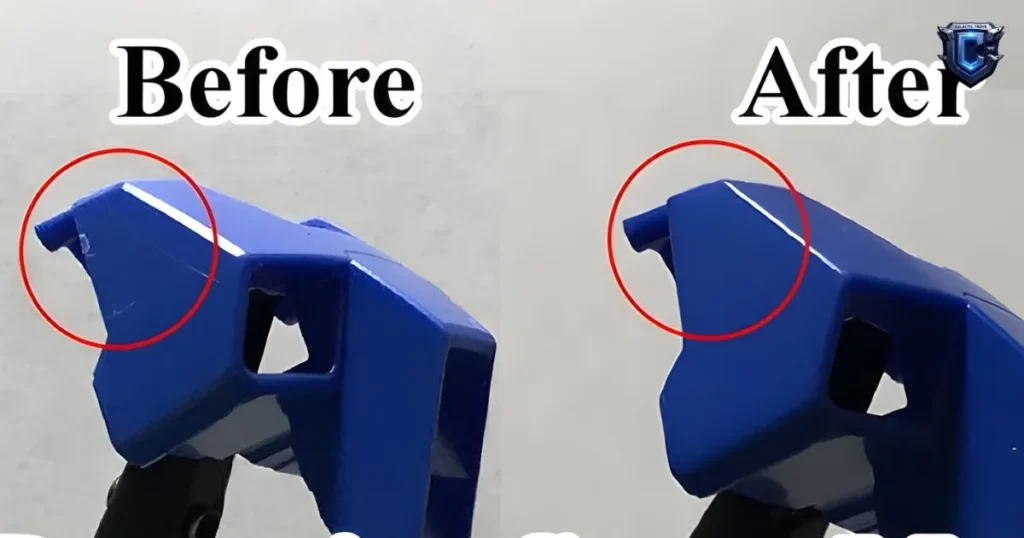
You used your decent nippers for clean cuts, but you still have those tiny little plastic nubs remaining. Those are your “nubs,” and if you don’t deal with them, they become the blemishes on your model, drawing the eye like a zit on prom night. This is where sandpaper and files – the second most critical set of basic tools for Gunpla beginners – come in.
No matter how good your nippers are (unless you’re using God Hand and are a zen master), you will still need to sand to completely eliminate the runner’s trace. Skipping this step is one of the most common beginner model kit mistakes, resulting in ugly protrusions on your finished model. A beautiful Gunpla is one where you can’t tell it was ever attached to a plastic runner.
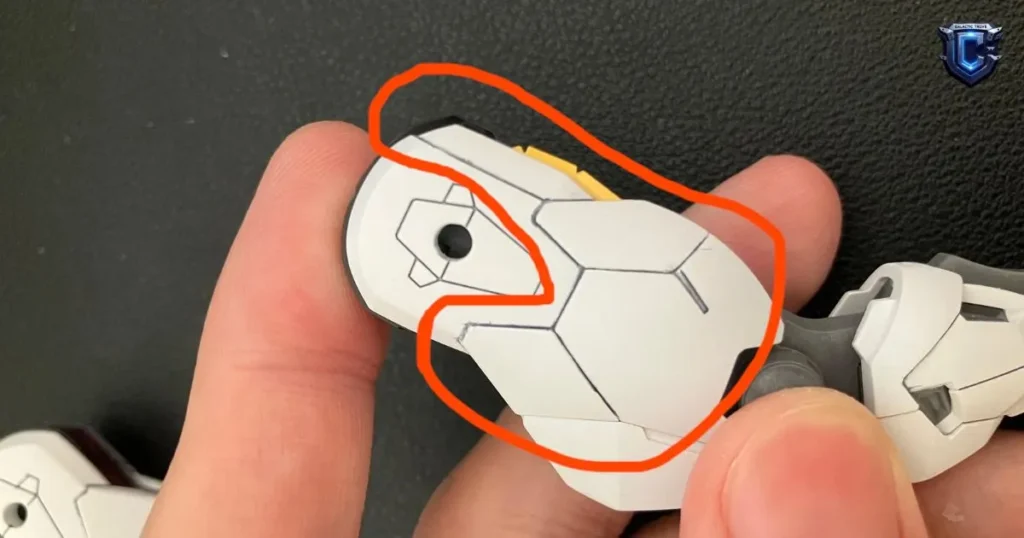
3. Nub Removal Nightmares Every Gunpla Beginner Faces
I once tried to scrape nubs with a razor blade. The result? I snapped off a finger on my MG Exia and left a deep, canyon-like scrape on the shoulder armor. The heartbreak of that moment still haunts my dreams.
Classic Scraping/Sanding Disasters:
- “Scooping” (Gouging): Scraping too hard or using the hobby knife incorrectly causes you to “scoop” out plastic from the piece, creating a depression. This makes your model look factory-defective.
- Wrong Grit Order: Using sandpaper that is too coarse (e.g., 180 grit) leaves permanent, deep scratches. This is often worse than leaving the nub marks themselves.
- Skipping Polish: You sand and the surface looks dull. If you don’t use finer grits (around 2000+) to polish it back up, the surface will look rough, which is a beginner model kit mistake easily remedied by the proper basic tools for Gunpla beginners.
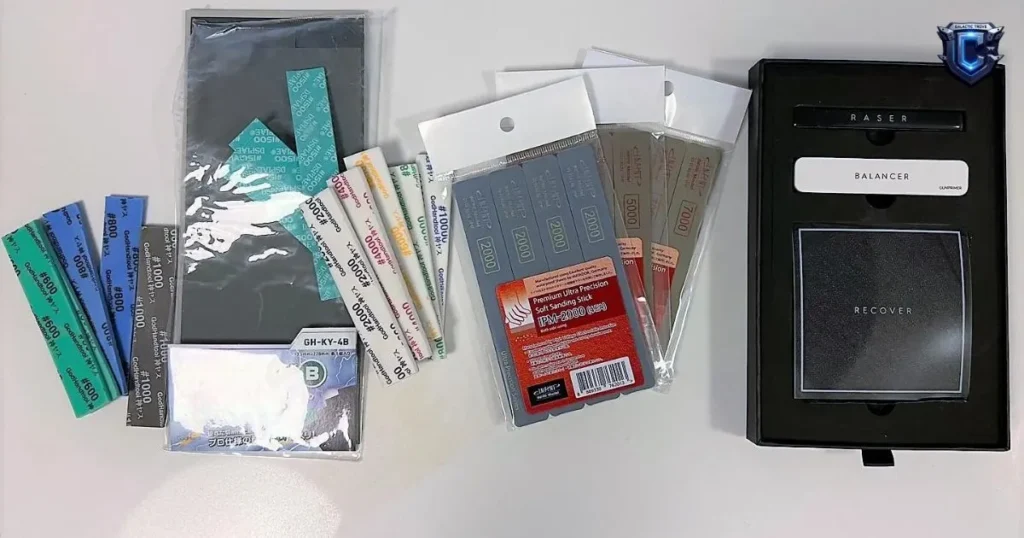
The tools you need are dedicated sanding sticks or micro-mesh sanding cloth. They come in varying grits and are designed to be easily handled for precision work on small areas. Trying to use hardware store sandpaper is one of the essential model kit tools traps many fall into.
alt=”basic tools for gunpla beginners nub removal fail”
4. Grit Guide (400 > 2000) – Basic Tools for Gunpla Beginners Edition
The process of Gunpla sanding is a transition. You must start rough and finish ultra-smooth. Here is your grit guide for these essential model kit tools:
| Grit Rating | Purpose | Notes |
| 400 – 600 | Rough Nub Removal: Eliminates the actual raised plastic leftover from the nippers. | This is the material removal stage. Don’t press too hard to avoid gouging. |
| 800 – 1000 | Smoothing: Removes the scratches left by the 400/600 grit. | The surface starts to feel significantly smoother. |
| 1200 – 1500 | Matte Finish: Eliminates the final deep scratches. | The surface will look uniform and ready for polishing. This is critical for basic tools for Gunpla beginners. |
| 2000+ | Polishing: Restores the shine on glossy or clear parts. | Necessary if you want a clean, unpainted finish. Part of the complete gundam starter tools kit. |
The golden rule: Always move from coarse grit to fine grit. If you skip from 400 to 2000, you will not remove the 400-grit scratches. This is a crucial rule in basic tools for Gunpla beginners that I had to learn with actual scars on my models. Don’t let your finished kit suffer yellowing because of an unpolished, rough surface.
III. Panel Lining – The Black Magic Every Basic Tool Kit for Gunpla Beginners Needs
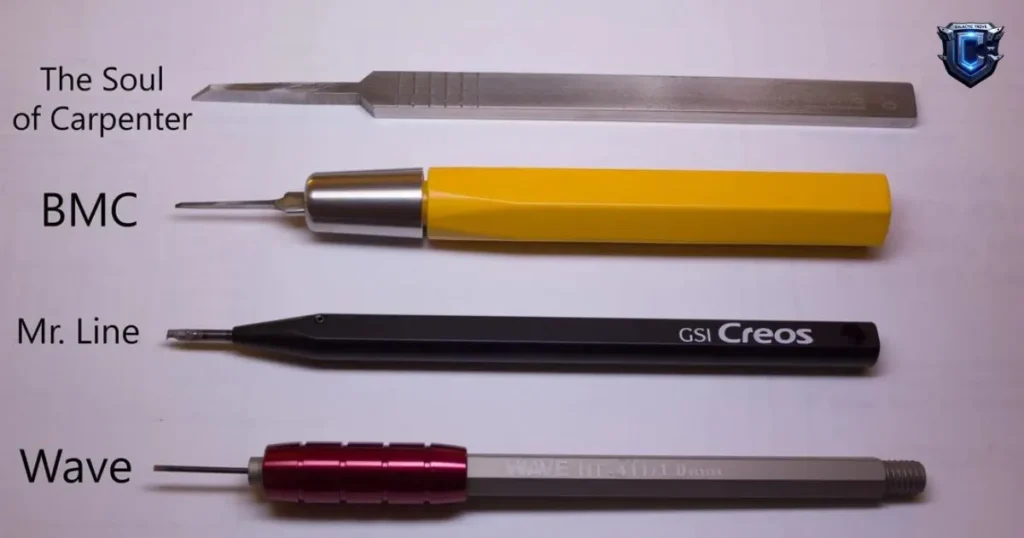
Once you’ve assembled your clean, nub-free model, it’s going to look a little… flat. Like a rough draft. That’s when panel lining steps in. This is the process of coloring in the recessed lines (panel lines) on the model to create depth, detail, and a realistic mechanical feel.
If nippers are the material foundation, panel lining is the soul. This is the step 80% of beginners skip, and 100% of those who skip regret it. It is an essential model kit tool for transforming a plastic toy into a miniature piece of art. The Gundam assembly tools 2026 list is incomplete without a proper panel lining solution in the basic tools for Gunpla beginners kit.
5. Marker vs Tamiya Panel Line Accent
There are two main roads to detail perfection:
- Panel Line Marker (Easiest for Beginners): Acts like a super-fine felt-tip pen. You simply draw into the recessed line. It’s easy to control, safe for the plastic, and simple to clean up if you mess up (just use your finger or a drafting eraser). This is the top choice for basic tools for Gunpla beginners because it’s so forgiving.
- Tamiya Panel Line Accent Color (Best Result, High Risk): This is a super-thin enamel wash. You touch the brush tip to the line, and the liquid automatically flows (capillary action) along the recess. The results are incredibly sharp and professional. HOWEVER, it’s an enamel paint, and its solvent (enamel thinner) can make ABS plastic (often used for inner frames) brittle, cracked, or snapped. This tool delivers beauty but is a potential disaster. If you use it, ensure you top-coat your plastic or are only applying it to PS/PE plastic parts.
I recommend that beginners start with panel line markers. Master the technique of highlighting details, then move on to the accent color if you’re feeling brave enough to deal with the potential heartbreak of solvent damage.
6. My First Panel Line Fail Story (Spoiler: I Used a Sharpie)
Oh, the regret of my youth! 15 years ago, I thought, “Panel lining? It’s just black lines. A Sharpie will totally work!”
The disaster was swift. A Sharpie is permanent oil-based ink. It didn’t flow into the panel line; it sat on the panel line. When I tried to wipe it off, it left permanent sticky black streaks on the white plastic. I used rubbing alcohol, which caused the plastic to start yellowing and turn brittle. I ended up having to paint the entire head of my Zaku II. That was a classic beginner model kit mistake I wish I had a gundam starter tools guide to prevent.
Lesson: Use the tools designed for the job. If you want a good-looking model, never use a Sharpie or a regular ballpoint pen. Stay away from those non-specialized scam tools! This is the black magic your basic tools for Gunpla beginners kit needs.
IV. Glue, Tweezers, & The Rest – Don’t Skip These Basic Tools for Gunpla Beginners
You might think Gunpla doesn’t need glue because it’s Snap-Fit. True… until you drop a microscopic part, or you want to fill those unsightly seam lines. And let’s not forget you need to handle those tiny parts safely. These are the little essential model kit tools that become lifesavers in an emergency.
Basic tools for Gunpla beginners are not just nippers and files. They are a whole support system of aids to prevent the heartbreak of losing a critical piece of plastic.
7. 10 Must-Haves Under $50 I Learned After 15 Years

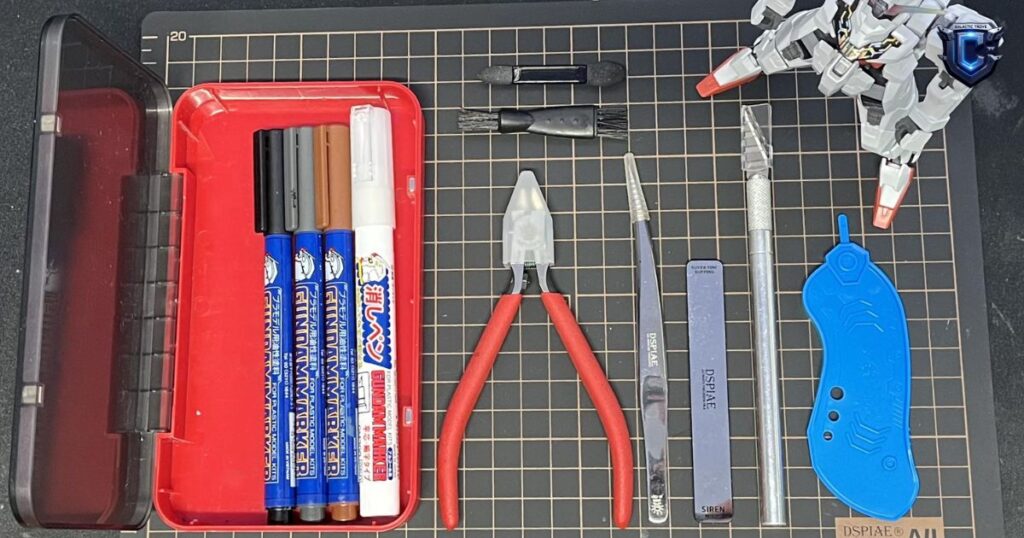
This is a list of small but mighty gundam starter tools, all within a comfortable price range for the absolute beginner:
- Hobby Knife (approx. $5-$10): Do NOT use for shaving nubs! Use this for cutting decals, light scraping of excess plastic, or cutting tiny parts that your nippers can’t reach. OLFA or X-Acto blades are the standard.
- Cutting Mat (approx. $10-$15): Protects your work surface. Never cut directly on your nice wooden desk.
- Tweezers (approx. $5): CRUCIAL for handling decals and small parts. They help you avoid leaving sticky fingerprints and prevent you from accidentally causing a part to snap due to uneven pressure.
- Plastic Cement (approx. $5): Used for permanent assembly or seam line filling. Tamiya Thin Cement is the standard. It melts the plastic to create a permanent bond.
- Model Kit Eraser (approx. $3): Excellent for wiping off panel line marker without damaging the plastic.
- Precision Pick (approx. $5): Helps you lift and place tiny stickers/water slides accurately.
- Parts Organizer Box (approx. $5): When you de-frame a model or work with small parts, a box with a lid will save you the regret of losing a crucial piece.
- Needle File Set (approx. $10): Great for reshaping corners or fixing warped peg holes.
- Cotton Swabs/Q-Tips (approx. $2): Essential for wiping away excess Tamiya Panel Line Accent Color.
- Drafting Pencil Eraser (White): A cheap insider trick for gently cleaning light pencil or marker marks off the plastic.
V. Full Beginner Tool Kit – What to Buy in 2026
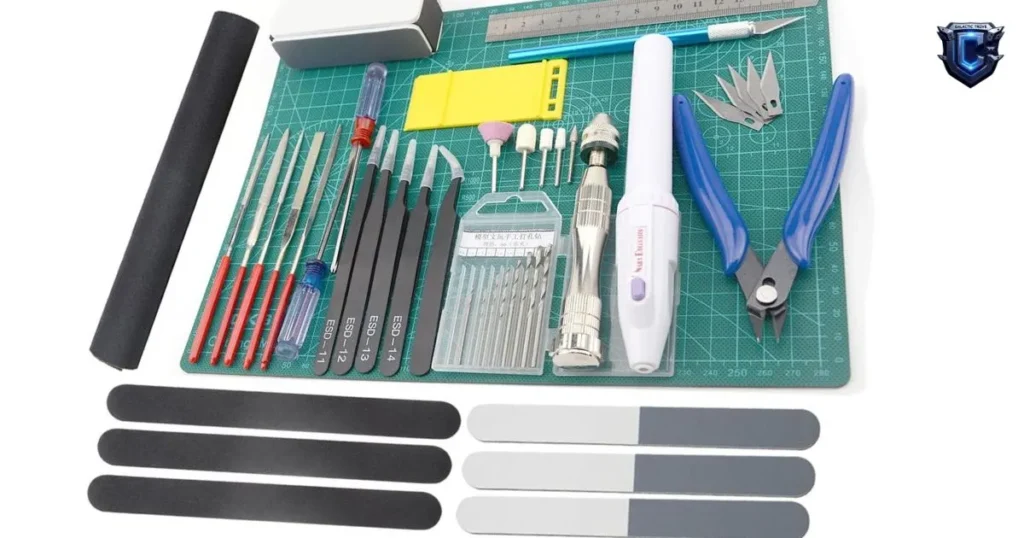
It’s 2026, and there’s no excuse to suffer through terrible tools. Below is the minimum essential kit of basic tools for Gunpla beginners that anyone serious about this hobby needs. Remember, shopping here isn’t an expense; it’s insurance against disaster and heartbreak.
You’re looking for a complete set of gundam starter tools to avoid beginner model kit mistakes? Don’t get lost on model kit tool kit amazon buying low-quality junk. Stick to the brands we veterans trust.
| Tool (Item) | Brand | Price Range (USD) | Link to Galactic Trove |
| Nippers (Cutters) | Tamiya Sharp Pointed | $25 – $30 | avoid this nipper trap |
| Hobby Knife (Precision Blade) | OLFA/X-Acto | $8 – $12 | start with our beginner kit |
| Sanding Sticks (400-2000 Grit Set) | GodHand/DSPIAE | $15 – $20 | this Gundam HG disaster |
| Panel Line Marker | Gundam Marker (Black/Gray) | $4 – $6/each | start with our beginner kit |
| Tweezers (Precision) | Tamiya/Generic Precision | $5 – $8 | avoid this nipper trap |
| Plastic Cement (Thin) | Tamiya Thin Cement | $7 – $10 | this Gundam HG disaster |
You can find all these essential model kit tools in our dedicated model kits category, tested and approved by Alex “The Regret Collector” Chen. We ensure you get the right gundam assembly tools 2026 needs for success.
➡️ Get the full basic tools for Gunpla beginners set here and build your masterpiece, not a monument to your regret! https://galactictrove.com/model-kits
Conclusion: Invest Wisely to Avoid Heartbreak
You made it this far, which puts you ahead of 90% of beginners. You understand that Gunpla is not just “snapping things together” but a process that demands respect for the material and the tools.
Stop scamming yourself. Basic tools for Gunpla beginners are not optional. They are mandatory. If you use bad tools, you get bad results. You’ll get white nub marks, snapped parts, and sticky glue surfaces. Invest in a good set of gundam starter tools from the start. The money you save on cheap nippers will quickly be spent on replacement kits due to the heartbreak of your first assembly disaster.
Come to Galactic Trove. We only sell the tools and kits we trust, so you don’t have to suffer through 15 years of being scammed and broke like I did.
- Best Detolf Alternatives 2026: 8 Cases That Elevate Your Jaegers - November 30, 2025
- Best Transformers Action Figures 2026: Only 7 Didn’t Make Me Want to Sell a Kidney - November 26, 2025
- The Benefits and Risks of Collecting Limited Edition Models in 2026 - November 23, 2025