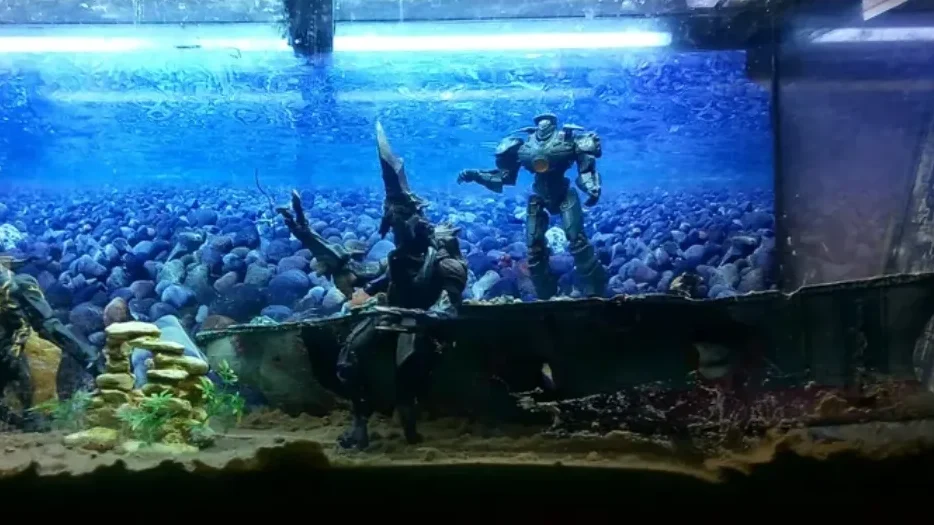
Pacific rim aquarium diorama – yeah, that insane glowing Kaiju cave with Gipsy Danger posing like it’s about to drop the hottest album of 2026. One photo hit the timeline and suddenly everyone and their dog is trying to submerge a $300 Jaeger. Spoiler: most of them are now crying over melted paint and rusty joints. I was patient zero. I killed three figures and $1,200 before I cracked the code. This is the no-BS, no-dead-Jaeger, under-$200 tutorial you actually need. Let’s make sure your Gipsy lives to fight another day.
Why This Build Is Still Viral in 2026
Look, I’ve been doing this for fifteen miserable years. I’ve seen trends come and go. Remember that awful Attack on Titan potato diorama? Me neither. But the pacific rim aquarium diorama? It’s the hydra of model building—cut off one head, two more pop up on TikTok. Even in 2026, it’s still the definitive flex for anyone with an extra 10-gallon tank and a crippling obsession with giant robots punching sea monsters.
Why does this particular build refuse to die?
It’s simple: The Scale and the Contrast.
You’ve got a massive, heavily-armed hunk of American steel, Gipsy Danger, locked in eternal combat with a biological nightmare, the Kaiju. But instead of the deep, dark, lifeless Pacific, you’ve submerged them in a miniature, vibrant, living ecosystem. It’s the juxtaposition of high-tech destruction and tranquil nature that hits people right in the FOMO bone. Plus, let’s be honest, we’re all a little bored. Watching a fish swim past a shrunken version of one of the greatest cinematic battles of all time? That’s entertainment, baby.
Every single pacific rim aquarium diorama you see online (except mine) is hiding a dark secret: they probably didn’t waterproof properly. Or they used a cheap, $15 Jaeger knockoff that instantly turned into a pile of white rust and dissolving paint fumes when it hit the water. I know this because I did it. The smell of cheap enamel mixing with stagnant tank water is a scent I will take to my grave. **$1,200 mistake, folks. Never forget.**
This guide isn’t about making a nice-looking diorama. It’s about building a piece of underwater art that won’t melt your prized Gipsy Danger or, worse, poison your poor betta fish. We’re going pro. We’re keeping it under $200 (not counting the figure itself, which you should absolutely get from us—check out our Pacific Rim Jaegers right here).
Complete Materials List Under $200 (2026 Prices)
Before you even think about putting your Jaeger near water, you need to understand that the “viral” builds are shortcuts to heartbreak and expensive regret. We’re using aquarium-safe materials, nothing less. Your total cost for the materials (tank, rock, sealants, lights) should hover around $150–$180.
| Item | Estimated 2026 Price (US) | The Jaded Collector’s Note |
| Tank | $40–$60 | 10-gallon standard. Don’t go bigger unless you want to spend $500 on figures. |
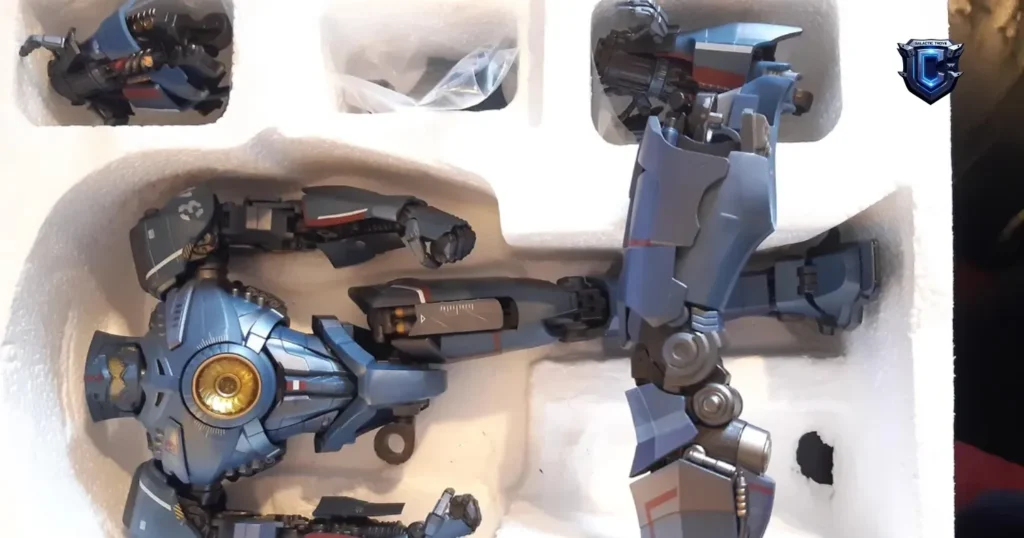
| Figure | $40–$100 | You need a high-quality, dense PVC or resin figure. No cheap KOs. grab a waterproof-ready Gipsy Danger before you start. |
| Silicone | $10–$15 | 100% Silicone Sealant. Must say “Aquarium Safe” or “Food Grade.” The non-toxic stuff, or you’re killing fish. |
| PVC Cement | $8–$12 | For bonding the foam rock together. Better than regular glue which dissolves over time. |
| Waterproofing Spray | $15–$25 | Krylon Fusion or an equivalent clear, non-toxic, sealant spray. This is the Jaeger’s life support. |
| Rigid Foam Insulation | $10–$20 | The pink or blue kind. This is your Kaiju Cave structure. Cheap, easy to cut, non-toxic. |
| Aquarium Sand/Gravel | $15–$25 | Dark, fine-grain substrate to hide the foam edges. |
| LED Strip Light | $10–$15 | Low-voltage, submersible, usually comes with a protective resin coat. Look for blue/purple. |
| Aquarium Moss/Plants | $10–$20 | Java Moss or Anubias. Keep it real, keep it simple. |
| Small Tools | Already owned | Hobby knife, sandpaper, disposable gloves. |
| Total Material Est. | $138–$212 | If you’re over $200, you’re buying too much fancy rock. |
Step-by-Step Waterproofing Pacific Rim Action Figures
This is the most critical section. Get this wrong, and your pacific rim aquarium diorama turns into a biohazard. This is where most people fail. They assume a plastic figure is waterproof. It isn’t. Paint is paint, joints are metal, and the moment water gets in, it’s a corrosion time bomb.
1. The Disassembly & Prep Phase
First, you need to be a Jaeger engineer. Carefully disassemble your figure. Remove any removable parts: hands, chest piece, elbow joints, etc. If a joint uses a small screw, remove the screw. If you can’t remove it, we’ll seal over it, but metal rusts.
- Sanding: Lightly sand the entire figure—yes, even the nice paint. You’re not trying to remove the paint, just scuff the surface with 400-grit sandpaper. This gives the sealant something to grip onto. Skip this, and your sealant peels off in six months. Regret is waiting.
2. The Great Sealing
This is where you save your $100+ figure from becoming a drowned tragedy. You need multiple, thin, even coats of your Aquarium-Safe Sealant Spray.
- First Coat (The Prime): Spray a light, even layer over the entire figure. Hold the can about 12 inches away. Focus on the joints and seam lines. Let it cure for 24 hours. Seriously, don’t rush this. This is your foundation.
- Second Coat (The Armor): A slightly thicker coat. Now, pay special attention to the joints. Spray into the gaps. You want the sealant to wick into the joint where the metal pin/screw is. This is crucial.
- Reassemble & Third Coat (The Final Lock): Once the first two coats are dry (another 24 hours), reassemble the figure. Now, use a toothpick and a tiny amount of the 100% Aquarium Silicone to seal over any visible screws, pins, or major seams you couldn’t get into with the spray. It’ll look slightly messy, but it’s underwater armor. Finally, give the entire, now-repaired figure a third, light, final spray coat.
Total Cure Time: 72 hours minimum. Do not introduce the figure to water until it is bone-dry and no longer smells like solvent. I learned this the hard way with a Striker Eureka that turned the tank water into a toxic, oily rainbow. Check out the full Action Figures collection (yes, Striker too)—just make sure they’re properly sealed before you send them into the breach.
Building the Kaiju Cave That Never Leaks

The glowing Kaiju Cave is the “viral” part of the pacific rim aquarium diorama. It’s the source of the bioluminescence and the dramatic contrast. You don’t build this with rocks; you build it with cheap, light, inert foam.
>>>>View More: Fish Tank Decor Rocks.Aquarium Decoration Model.Easy and Quick Solution for Aquascaping.(Cave of Gods)
1. The Foam Foundation
- Cutting: Take your rigid foam insulation and start cutting and shaping it. You want an organic, cave-like structure. Think eroded rock face, not Lego blocks. Crucially, you need to carve out a channel inside the rock structure to hide your lighting and wiring. This channel must be totally sealed off from the tank water once complete.
- Bonding: Use your PVC Cement (not silicone yet) to bond the foam pieces together. Clamp them and let them cure. This cement creates a stronger bond between the foam pieces than most regular glues, preventing them from floating apart under water pressure.
2. The Waterproof Shell
This is the big secret. You can’t just throw painted foam into an aquarium.
- Texturing: Once your basic cave shape is bonded, use a hot wire cutter or a heat gun (carefully, in a well-ventilated area!) to melt and pit the foam surface. This gives it that jagged, rocky texture.
- The Cement Slurry (Optional, but Pro): For a truly rock-like look, mix up a thin slurry of Portland cement and water. Paint this onto the foam structure. It gives the foam a hard, porous shell that looks real. Let this cure for days. You MUST soak and rinse this multiple times before it ever sees your tank. Concrete is alkaline and will spike your pH.
- The Final Seal: Once the slurry is cured, or if you skipped it, paint the entire structure with a thick coat of your aquarium-safe silicone sealant. This seals everything—the foam, the cement, any potential toxic residue—under an inert, non-leaching layer of clear silicone. Use a brush to stipple it on for a rough texture.
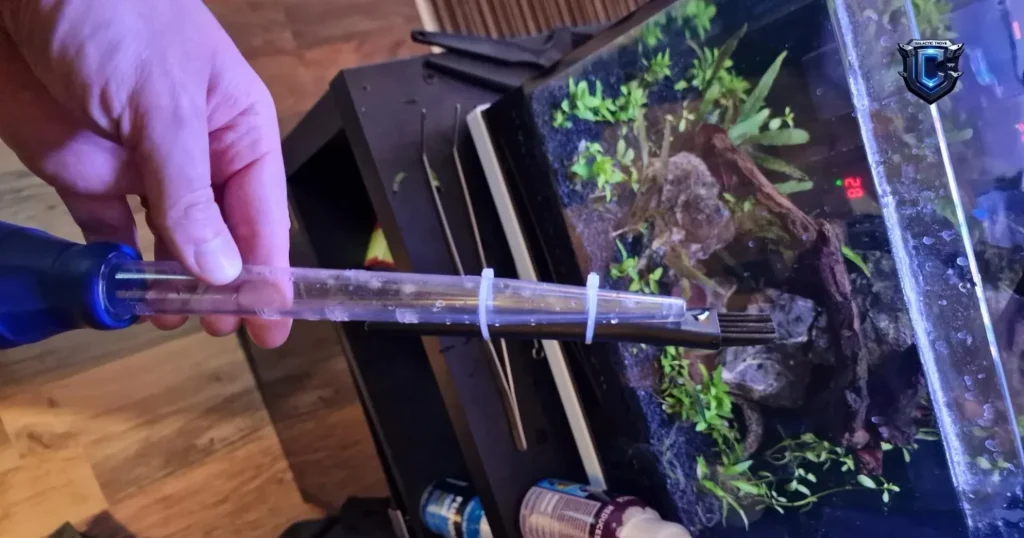
3. The Light Channel Lock
Remember that internal channel for the lights? Seal the bottom of the structure to the tank glass with a bead of silicone, and then absolutely flood the channel opening with silicone. The goal is to make sure your LED lights & resin for the cave are sitting in a totally dry, sealed-off compartment. If this leaks, you get corrosion, potential electrical hazards, and you have to drain the entire tank to fix it. Trust me, I’ve done it. The disaster was spectacular.
Moss & Zero-Maintenance Greenery
A pacific rim aquarium diorama needs life. But we are aiming for zero maintenance because we are collectors, not professional aquatic gardeners. We just want the dramatic, eerie jungle vibe.
1. Plant Selection for the Jaded
Forget the fancy $20 stems. We’re using cheap, easy, and practically indestructible plants.
- Java Moss: The MVP of the lazy collector’s tank. It just is. It needs low light, attaches to anything, and looks like the ocean floor is trying to reclaim the Jaeger.
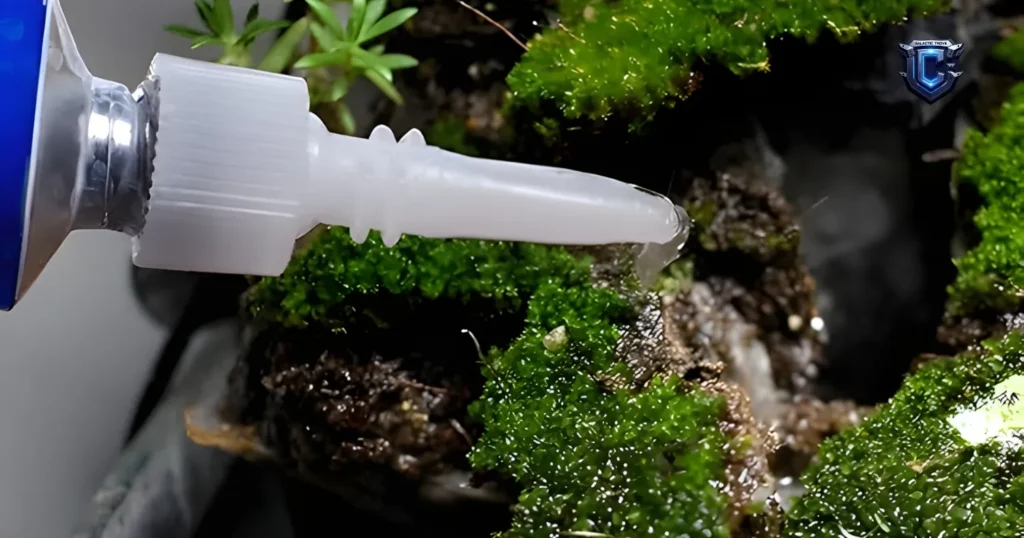
- Anubias Barteri: Big, tough leaves. Glue the rhizome (the thick root part) to your Kaiju Cave structure with a tiny dab of super glue gel (cyanoacrylate—it’s aquarium safe once cured). Do not bury the rhizome in the gravel or it will rot and turn your tank into a swamp.
- Fake Plants (The Secret Sin): Look, some fake plants are fine. Just make sure they are aquarium-specific plastic or silk. The cheap dollar store stuff is painted with toxic chemicals that will leech into the water. I drowned a rare pleco once with a $3 plastic vine. Lesson learned.
2. The Substrate and Placement
Use a mix of dark sand and gravel. The dark color makes the Gipsy Danger figure and the blue glow from the cave really pop. Layer the substrate at the front and use it to transition the bottom edge of the Kaiju Cave into the tank floor. You want the whole setup to look like it’s been there since the first breach.
If you need extra tools and moss packs to get started, we’ve got you covered.
Cinematic Lighting Secrets
The glow is what makes the pacific rim aquarium diorama truly viral. It’s the Kaiju’s blue blood (or whatever that stuff is) illuminating Gipsy Danger from below.
1. Choosing the Light
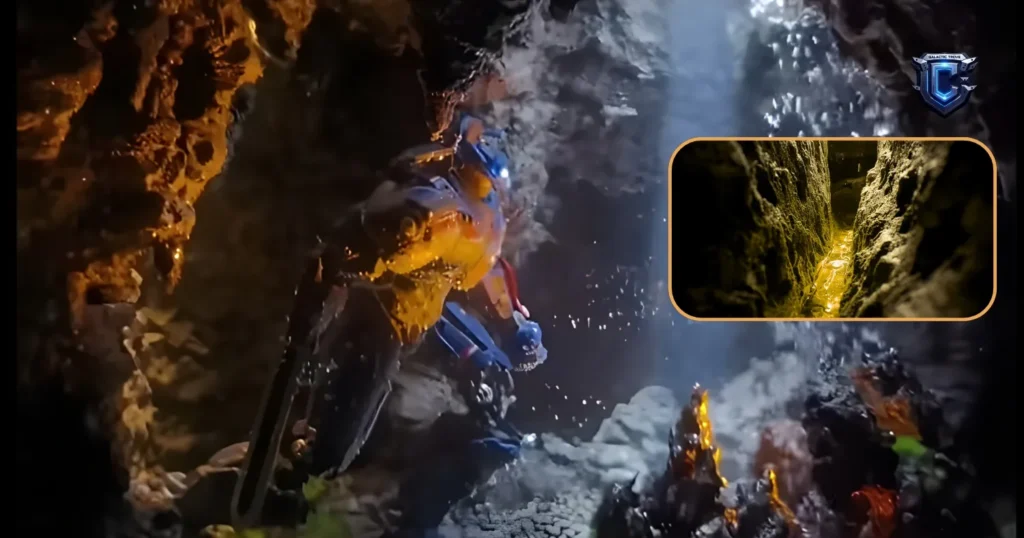
- Color: You want deep blue, purple, or UV/actinic lighting. This replicates the cold, unnatural glow of the Breach and the Kaiju’s bio-sign.
- Placement: The light strip goes into that sealed channel inside the Kaiju Cave structure. The light shines outward and upward, casting dramatic shadows on the figure.
- Power: Keep the light strip outside the water unless it’s explicitly rated as submersible and has a low-voltage connection. Even then, the connection point must be external.
2. The Resin/Epoxy Trick
This is the final pro move for maximum glow and safety.
Once your light is in the dry channel, pour in a layer of clear aquarium-safe resin or epoxy. This fills the light channel and completely encases the LED strip and its wiring. When cured, this layer acts as a diffusing lens, giving the light a softer, more ethereal glow. It also creates a 100% waterproof barrier that absolutely ensures your lighting system never, ever touches the water. It’s overkill, and that’s how you avoid a $50 heater short-circuiting and frying your fish. Safety first, because I once had a cheap USB light set my shag carpet on fire. True story.
Top 5 Pacific Rim Figures That Survive Water
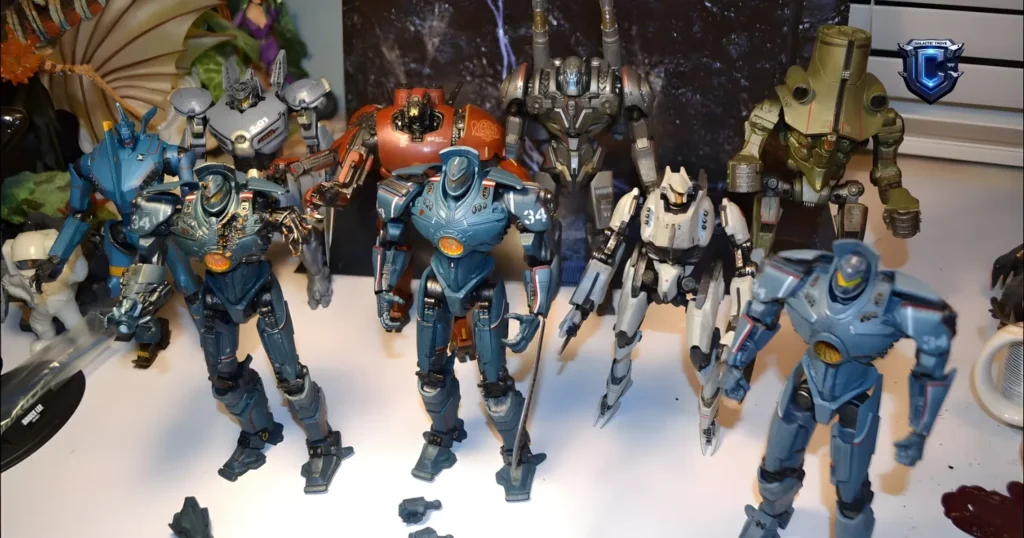
Not all figures are created equal. You need dense, non-porous plastic, minimal metal, and quality paint. These are the ones I’ve personally tested (and tortured) in an aquatic environment. If you want to start with these Jaegers before you drown them, you’re making a smart choice.
| Rank | Jaeger/Kaiju | Why it Survives the Breach |
| 1. | NECA Gipsy Danger (PVC) | Dense PVC construction, minimal joint gaps. Excellent figure for this. |
| 2. | Bandai Tamashii S.H. MonsterArts Kaiju (Select) | High-quality, non-toxic paint used for the Japanese market. Great for the Kaiju cave. |
| 3. | Select PVC Striker Eureka | Excellent density. The only downside is the relatively exposed hip joint. Seal it well. |
| 4. | Diamond Select Cherno Alpha | Tank-like construction. The bulkier the Jaeger, the fewer small parts to worry about sealing. |
| 5. | Resin Kit Jaegers (Sealed) | If you use a quality resin kit and seal it with the marine-grade epoxy, it becomes virtually indestructible. |
The Golden Rule: Always stick to figures that have molded color or are painted with high-quality, dense acrylics. Cheap factory paint will dissolve and peel like a bad sunburn. Seriously, go grab a waterproof-ready Gipsy Danger that’s PVC, not hollow ABS plastic.
Maintenance & My Biggest Disasters
You’ve built the ultimate pacific rim aquarium diorama. Congratulations. Now, you have to maintain it. And here’s where the jaded collector steps in with the cold, hard truths.
1. Water Changes and Figure Integrity
- The Wipe-Down: Algae will grow on your Gipsy Danger. It’s inevitable. Do small, frequent water changes (10–15% weekly). When you do, use a soft toothbrush and gently wipe the algae off the figure. Do not use chemical cleaners.
- Watch the Paint: Every six months, take the figure out for a close inspection. Look for bubbling paint, white corrosion spots (where water got to the metal inside the plastic), or peeling sealant. If you see it, take it out, let it dry, sand the spot, and re-seal it immediately. Ignoring it is how you turn a $100 figure into a $5 pile of junk.
2. My Top 3 Pacific Rim Aquarium Diorama Disasters
- The $1,200 Mistake: I mentioned it. Three figures. One was an early, unsealed NECA Slattern. I thought it was tough enough. Within a week, the paint was gone, the plastic was swelling, and the metal joints were rusted solid. Cost to replace: $350. Cost to deep-clean the tank: $200. Emotional cost: Priceless heartbreak.
- The Silicone Fail: Used a generic “waterproof” silicone from Home Depot instead of “Aquarium Safe.” It leached some kind of toxin into the water that killed every snail and shrimp in the tank. The entire ecosystem had to be nuked and restarted.
- The Floating Jaeger: Didn’t weigh down the hollow ABS plastic figure enough. It bobbed to the surface two hours after the fill. Had to drill holes into its feet and fill the body cavity with gravel, then seal the holes with silicone. Felt like I was waterboarding a robot. It worked, but it was an amateur hour disaster.
Seriously, this hobby will find a way to take your money. Follow this guide, and you can avoid the worst of my fifteen years of financial regret. Don’t be me. Check out our 2026-ready Pacific Rim lineup and save yourself the grief.
Conclusion: Your Viral Flex Starts Now
You now have the absolute, no-BS guide to building the viral pacific rim aquarium diorama without becoming another cautionary tale on a collector forum. You know the secrets: aquarium-safe sealant is the Jaeger’s armor, foam is the only way to build a leak-proof cave, and you must cure everything properly.
Stop watching those slick TikTok videos and start building a permanent monument to the fight against the Breach. This project is a test of patience, sealing, and material science, but the result is a one-of-a-kind display that will make every other collector weep with envy.
Now, stop reading and start sealing. You’ve got a Gipsy Danger to save.
FAQ: Your Pacific Rim Aquarium Diorama Questions Answered
Q1: Is the figure safe for my fish, really?
A: Only if you follow the sealing steps perfectly. The pacific rim aquarium diorama is safe only if the figure is completely encased in non-toxic, 100% aquarium-safe silicone or clear sealant. Unsealed figures will leach paint, toxins, and rust into the water, which can kill fish and invertebrates. I killed a whole school of tetras by rushing the cure time. Don’t be a monster.
Q2: Can I use regular spray paint for touch-ups?
A: Absolutely not. Regular spray paint is not food-grade or aquarium-safe. It contains solvents and pigments that will slowly poison your tank. Any paint you use must be rated for aquatic use (usually specialized epoxies or acrylics), and even then, it must be completely sealed over with the final layer of clear, aquarium-safe sealant.
Q3: Why did my Kaiju Cave start floating?
A: You used a material that wasn’t dense enough (like hollow plastic or thin foam) or, more likely, you didn’t seal the bottom edge of the foam to the glass with enough silicone. Air pockets inside the foam or under the structure act like a buoyancy vest. Drain the tank slightly, use more silicone to seal the edges, and place a heavy rock on top overnight while the silicone cures.
Q4: How do I clean the algae off Gipsy Danger?
A: Use a brand new, clean, soft-bristled toothbrush during your weekly water change. Gently scrub the figure. Do not use magnets or specialized algae scrubbers near the figure, as the figure’s sealant is not as hard as glass and can be scratched, potentially compromising the waterproofing.
Q5: Can I put a battery-operated light inside the Kaiju cave?
A: This is a disaster waiting to happen. While technically possible, if the battery casing leaks (and they always do underwater eventually), you introduce heavy metals (and a potential electrical short) directly into your tank water. Always use a low-voltage, externally-powered LED strip and completely embed and seal it with aquarium-safe epoxy resin inside the foam structure, as detailed in the guide.
- Best Detolf Alternatives 2026: 8 Cases That Elevate Your Jaegers - November 30, 2025
- Best Transformers Action Figures 2026: Only 7 Didn’t Make Me Want to Sell a Kidney - November 26, 2025
- The Benefits and Risks of Collecting Limited Edition Models in 2026 - November 23, 2025